Pages

March 29, 2013

Now that's a Spicy Meat-a-ball!

Hi y'all! What a week. I havn't been posting as much becasue work has been crazy and I am just plain exhausted when I come home. So I do what needs to be done and blogging isn't always at the top of the list. In fact it is ususally about 4th or 5th on the list. Just got caught up on the laundry so I am feeling pretty good about myself!

I did do a small project about a week ago that not only was easy but helped me finally have access to my spices. I am a short girl, only 5' 4" and my spices sit in a cabinet that is about 6' high. I always had to get my daughter's stool to see what I had and frankly I was getting more thatn a little annoyed by this.

Sometimes a solution presents itself when you are not even looking. I was at the Dollar Store, looking for who knows what, and happened upon some little spice jars. Snatched up 12 of them and started to dream up a spice rack from whatever I had at home to house them.

Pallet Wood! You know I have tons laying around so I got to work building myself a rustic spice box.

This only took me about 30 minutes to build the box. Then I begged and pleaded with my sweet friend and neighbor, Amy, to come up and hand write the labels because my handwriting is atrocious and hers is stellar.
I have them in alphabetical order so they are not only easy to find but now eeee-zzzz to reach!

So here's the skinny on how to make YOUR spice box:
old pallet wood, sanded well on all sides
wood glue
1" finishing nails
hand vice
spice jars
miter saw
Start by laying out your spice jars to see how you wide you need the box to be. I have mine in two rows but you may want them in a single row. Just cut you bottom piece according to how you want them arranged. Leave a little room on all sides of the jars for easy removal. I forgot to take a picture of this so sorry bout that. 
Amateur.

Add glue and then nail you front and back pieces to the bottom piece. 
Now old pallet wood is a little wonky at times so you may or may not need the hand clamp to hold you side pieces square.
 I needed it.
 After getting you sides square, NOW take you end pieces and measure them precisely and then cut to length. Don't cut them to length until you have these three pieces assembled or they will be too long. Add wood glue.


Nail in place.

Marvel at your bad self! If you want your labels to peek up over the edge so it is even easier to see, you can do two things. The smart thing would have been for me to rip all of the wood sides in half and that way I wouldn't have to worry about that. Since I did not plan well, you can just add a piece of wood to the inside and then add you spice jars as you sing Josh Grobin's "You raise me up..."

Or not.

This cost me $12 which was just the cost of the jars. So see what you've got laying around the house first before just going out and buying what you need. 


You might be surprised at what you come up with when challenged to use what ya' got!


Always being renewed,


March 27, 2013

A hang your coat What will it be Wednesday

Ok, put on your thinking caps and prepare for a speed round of What Will it be Wednesday!

I found this lovely piece of rusty goodness in the trash and of course had to stuff it in the car ASAP.
My kids were none too thrilled to have spider webs and dirt touching them but I assured them it would be totally worth it!

This is it cleaned up! 
So can you hang your hat on what I will turn this into????
Do tell!


Always being renewed,


March 23, 2013

My Frenchy Bench

Oh my. This bed gave me pups trying to turn it into a reading bench. But I am so glad that I persevered and took my time because I love it and can't wait to get it to the booth! Unless of course one of you is interested in it for your reading nook then email me and let me know asap and we can talk pricing!

But for now, here is the beauty shot!

And here it is before... of course I had cut the foot board in half before I took the before shot. Am I being redundant??


I had planned to use the hooks already provided to make the front brace so I had to take one side apart to get to the brace so I could see how it all went back together.

Removed wood piece covering the metal plugs holding the brace in place. Since I couldn't get to these, I just cut off the end 

and pried the pieces apart.

which then presented me with another wood piece to remove before 

....finally getting to the brace. At which point I gave up  for about 2 months because I realized I would not be able to reattach the brace in the same fashion and have any hope of it holding. So I painted some other furniture and just kept thinking on a solution. I finally decided to just counter sink screws from the outside of the side pieces and then cover with a wood peg. I actually like the added detail.

So then I got to painting my bench in what I thought was a perfect frenchy grey. Nope. Too blue and no amount of distressing, or added white paint or stain (see the lower left corner of the front brace) was making it any less blue. Fast forward to our Living Room Reno in February and I had found my frenchy grey! It was living on my ceiling the whole time! So I slapped some paint on the bench (very professionally of course), distressed lightly, and then waxed to nice shine. 

UPDATE: 
Thank goodness for comments! I totally forgot to show how I had created the brace on the back to hold the slats until Patty left a sweet comment and wanted to know this so she could make one herself. Well, Patty, here are the pics and info. and I apologize for leaving this out!

This is what the front brace looked like. Remember I used the original side piece so I did not have to do anything here except connect it to my side pieces. If I have not said it before, always use wood glue and screws to make you benches. Much sturdier than just screws. Once I had the frame all made, then I measures how high the front brace was from the floor and marked it on the back headboard with pencil. Use a long level to make sure your brace will be level. Measure in a few places to make sure all is level.

I purchased a 1"x 2" piece of pine and cut to length. Add glue to the back side of your 1 x 2, and clamp your wood piece in place using 5-6 squeeze clamps.  Pre-drill holes for your screws. You will need screws that will go through both the headboard and wood brace. I used 1.5" wood screws.  Now screw in your screws.

I had a few slats left over from when my son had a loft bed so I was able to cut these to length to fit across and provide support for the mattress.

So now you know how to do the braces.  Back to our regularly scheduled post......

And then couldn't get the thing out of my basement. I was ready to cry when my hubby came home and noticed my distress. His response? "Why didn't you come to the expert?"
See, in a past job life my husband was a furniture mover. He had it wrapped in plastic in 10 minutes flat, took the basement door off and it was up and out in about 30 minutes so I could take said "beauty shot" in the house! What he does for me is amazing.
Love. that. Man!

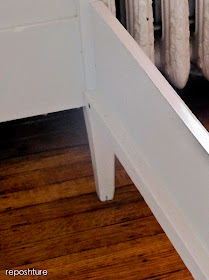
You can see the wood buttons on the front leg. 

The cool thing about double beds that you have turned into a bench is that they are the perfect width for a crib mattress! This will save some money on the cost of making a cushion and cushion cover. You can get all kinds of cool crib sheets now a days and you could even add an egg crate to the top if you wanted more "smooshiness" (aka comfort) for the top of the mattress.  

Just add pillows, a good book, and some french roast coffee, of course, and you are well on your way to an afternoon of ease.
Oh and  maybe some chocolate cake.


Always being renewed,


Please see the link party page to see where I link arms with those blissfully beautiful bloggers that host every week. So gracious they are along with these other sweet ladies! Todays Creative Blog vif187 all crafts Homemade Projects ~ Add Yours! {5/1} Home Stories A2Z  
We Would Love For You To Join Us Each Wednesday... southern hospitality

My Repurposed Life My Uncommon Slice of Suburbialollipops

Three Mango Seeds
Funky Junk's Saturday Nite Special
Mod Vintage Life

March 22, 2013

I hear the ocean.....and it's BIG!

Every once in a while at the thrift store you need to purchase something that is just crazy good. I found this gigantic conch shell for $4.99! Things like these add interest and texture to your home so don't hesitate if you see one.  
AND they would cost you about $50 at the beach stores which is another reason why you should buy them when you see them. 

Plus if you can't find your hand weights because a certain 4 year old has decided to move them, this shell is about 5 pounds so it will help your bicep workout in a pinch!


Plus it always gives you another good story to tell...... 

Always being renewed,