July 19, 2013

Modern Orange

If you know me then you know I loves me some orange! I have been dying to paint a piece of furniture orange for like foreva. Well, I finally did it.

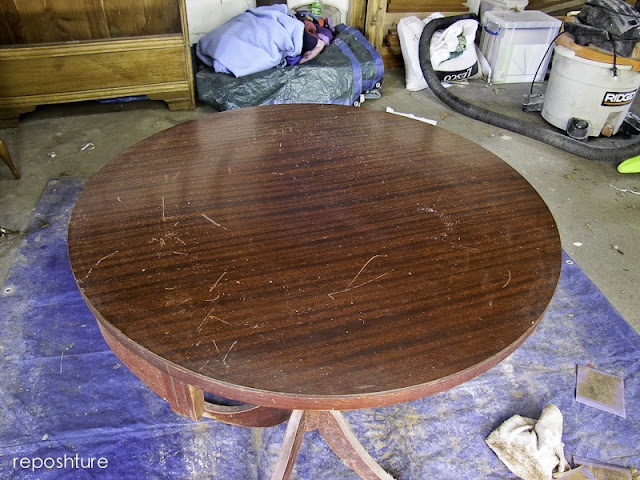
 I found this little table at an estate sale and snapped it right up.

I snapped it up so fast I didn't really take a good long look at it like I normally do to see if it needs any major repairs. I overlooked a pretty messed up foot. 

And it was in front!

Thank goodness for Bondo, again. It has come to my rescue more times than I can say.
Yes, all that pink is Bondo. That is how seriously this foot was flawed. The wood looked like something had gnawed on it. I had to put about 3 layers on it to build it up over and above what I needed so I could sand it down into the shape of all the other feet. But now it is S.O.L.I.D. and level. Which is always good for a table.

So are you as happy as I am to see an orange table? 
I love the teal and orange combo. These colors are complimentary which means, when placed next to each other, they reinforce each other. In other words, they bring out the best in the other color. 

I also love that this traditional table looks really modern just by changing it's clothes. 

Of course I lined it with orange paper. If I'd had teal paper, it would have been a way tougher decision. 


I seriously love, love, love orange.
Seriously.


Always being renewed,


Please see the link party page to see where I link arms with those blissfully beautiful bloggers that host every week. So gracious they are along with these other sweet ladies!
DIY Show Off
Read more at http://diyshowoff.com/2013/04/01/that-diy-party-10/#xgMAcRCgRocl5vmh.99  Todays Creative Blog vif187 all crafts Homemade Projects ~ Add Yours! {5/1} Home Stories A2Z  
We Would Love For You To Join Us Each Wednesday... southern hospitality

My Repurposed Life My Uncommon Slice of Suburbialollipops

Three Mango Seeds
Funky Junk's Saturday Nite Special
Mod Vintage Lifestartathome.blogspot.com

July 18, 2013

Crafting with my boy-ee! Airsoft style!

I have had a really nice break from my usual routine over the past week or two. Usually I am doing all manner of crafting with my two wee chickadees. So when my sweet 14 year old son asked me to help him do some custom painting on his airsoft guns...I dropped everything and grabbed the spray paint!

We remade his tan desert style gun into a black and blue tiger stripe number by simply making a stencil like below:
 laying it across the gun and spray painting it.
 Now if he is ever in a blue jungle, He's golden!

Then he had BIG plans for me to tackle on his metal footlocker! This is actually a metal insulated cooler found on the trash. I should have grabbed the other 3! When I went back they were all gone. This one was in the best shape though and the church that was throwing it out was a Meals On Wheels kitchen so I think they might have finally gotten so upgraded food coolers! Good for them!

He wanted the symbols for Biohazard, Chemical, Radiation, and a Spartan Helmet stenciled on this thing! This is what happens when your kids see you create crazy stuff. They think you can do anything!
He didn't realize that they don't make stencils for these symbols. I had to draw them and cut them out of contact paper. 


These have been some of my favorite projects mostly because I have enjoyed seeing his mind get creative and marry it to things he loves and I get to spend time with him and teach him some painting/crafting skills along the way.

I feel very blessed that my teenager still likes to hang with his mommy.

Always being renewed,


July 13, 2013

The looooong and the short of it.....Table legs that is!


 So I promised to show you how I made my caster legs a few days ago and today's the day!
Here's the skinny on how to make these legs! You will love how easy it is.

You will need:
drill
4 salvaged table legs
4 casters
 large drill bits
  heavy duty 1.5"  hex screws
washers that screws will fit through
wood glue

So this is what I used for my legs. There are four legs but I had cut one already before I took the picture. The casters I salvaged from two dressers that were missing a caster or two. Always save hardware! You may not use it on the piece again but you may need it someday so you'll be glad you did. 

Those legs I got from the trash....natch.

Measure how tall you want your coffee table to be. Mine will be 18 inches tall as that is the height of my couch cushions and I read somewhere that a coffee table should be at or slightly below the height of your cushions. Since the coop is 9.5" tall I need legs that are 8.5"long including the casters. So take the height of the wheel and minus it from the overall length and you have how long your wood leg should be.

I used a circular saw on this first leg before I realized my miter saw would be much easier to use. I, uh, also forgot to measure my overall length and just cut the legs where I thought it would look good! I had to go back and cut it at the flat square part about 10 minutes later.

So here is the trick that you need to know to make this work right. Take you drill bit that is slightly smaller than the circumference of your screw. Hold up your screw so that the end of the screw protrudes past the end of the drill bit slightly. Put a piece of tape at the bottom of the threaded shank. This will help you control the depth of the drill bit. You want some solid wood at the bottom of the hole so your screw really sinks it's threads in and holds tight.

Now put your leg in a clamp and drill your hole in the center. Only go to the depth of the tape. Do this for all 4 legs.
Turn the legs over and do the same thing on the bottom for the casters. Make sure you change out the drill bit size so it is slightly smaller than the diameter of the caster peg. Add  your casters and get ready to attach the legs to your new coffee table coop!

A great way to mark the placement is to turn the leg over, place it where you want it and then give it a tap.Some of the left over wood shavings will come out and tell you exactly where to drill your hole! 

Genius I know. Every once in a while the light bulb burns brightly....

Now place a washer on the screw and insert the screw into the hole from the inside of the coop and then screw on your legs. I added a bit of wood glue to the top of the leg so it won't wobble. And I used a wrench to help hold the screw top as I tightened the leg down.

That's all there is. This took about an hour give or take as I think I had to make lunch in there somewhere for some hungry mungries. 
I am looking for some cute bird figures to put inside
Cheesy or classy?
You decide.

Always being renewed,



Please see the link party page to see where I link arms with those blissfully beautiful bloggers that host every week. So gracious they are along with these other sweet ladies!
DIY Show Off
Read more at http://diyshowoff.com/2013/04/01/that-diy-party-10/#xgMAcRCgRocl5vmh.99  Todays Creative Blog vif187 all crafts Homemade Projects ~ Add Yours! {5/1} Home Stories A2Z  
We Would Love For You To Join Us Each Wednesday... southern hospitality

My Repurposed Life My Uncommon Slice of Suburbialollipops

Three Mango Seeds
Funky Junk's Saturday Nite Special
Mod Vintage Life

LinkWithin

Related Posts Plugin for WordPress, Blogger...