Showing posts with label front entrance. Show all posts

April 11, 2012

The project that keeps on giving.....

Somebody stop me!

About a month ago I decided to reposhture my front entrance. You can see the progress, here, here, and here.

Although I love it, the walls just didn't seem finished.  So I added upholstery nails. What do you think?


And I really need your input on this one, should i leave it alone, should I add covered buttons to really make it look upholstered.

Or is enough is enough already?

Now I'm off to make a Rapunzel cake for my wee Tessa who will be 4 tomorrow! Wish me luck or send the cake fairies to help a motha out.

Always being renewed,


Don't forget to vote for this blog using the On the Picket Fence button. You can vote once a day!! and if you like what you see anywhere on this blog, please feel free to Pin it. I want to feel like a pincushion from so many pricks!

April 1, 2012

Silver tray "wreath" tutorial


I am loving all of the unique wreaths that are making their way around the web and Pinterest so I thought I'd try my hand at it. It has been years since I have made anything floral but I am pretty happy about it. Actually I did do my happy dance for about 2 minutes when I hung it to see how it looked. Couldn't help myself. You know you do it too so no judging.  


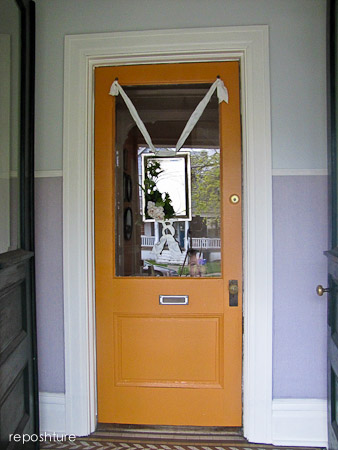
Here is how it looks on my door. You can see it's transformation here.


Here is how the silver tray got transformed into a "wreath":

You'll need: glue gun, sheet moss, silver tray, Styrofoam balls (two different sizes, one of each), 3" ribbon, 1.5" ribbon, silk greenery sprig with lots of textures and different leaf shape, flowers of your choice, possibly a drill (you know I loves me some power tools)


 My silver tray must have had handles because it already had holes. If it has handles, just thread your ribbon through the handle/ Otherwise....
Make bigger holes with your drill so you can thread the ribbon. Use a drill bit made for metal and use eye protection. At this point, my camera batteries died so I had to recharge them.  While I was waiting for them to recharge which takes a few hours, I thought I'd go get my lips plumped.  My daughter wanted to do the same. Now don't go reporting me to the authorities but I don't have a problem with that.
 As long as they are wax! Don't we look de-lovely?!  We laughed ourselves silly taking all kinds of pictures with these on. Love that girl, she is a beauty truly from the inside out.
 Kiss, Kiss. Now back to some serious crafting shall we?
 I made my hole 5/16 just so you know.
 Carefully thread your 3" ribbon through the holes as above, making sure you don't pull it on the rough opening 
 Cut your Styrofoam balls in half and hot glue them to the tray. If you notice, I did not polish my silver tray. I love the tarnish so just use Windex to clean your fingerprints and  your good.
 Pull your sheet moss apart and cover the Styrofoam with it using hot glue.
 I added the glue to the moss and then placed it on the balls.

 Now cannibalize your floral stem. I almost always cut my stems apart and just use what I want. That way I get to place my flowers or foliage where I want it and not how the floral stem makers decided to put it together.
 Start adding your foliage and flowers however you like! See how I put some long spikes on the right? Cannibal florist!!   Now at this point this bad girl needed some color so I added some deep purple ribbon. Why purple? Because purple and orange look amazing together. Something about them being tertiary colors is the idea.
 Cut a 2.5 " piece of your 1.5" wide ribbon, fold in half and wrap some wire around it tightly
 You are making a small loop like this. I made three and hot glued them near my roses.
 I added some foam cushion so it won't bang on the window so badly the million times my door is going to get opened and closed by my three human beans.
And here she is all dolled up. I added the ribbon at the bottom by threading the ribbon from the back and tying it once, then tying another tie with a small opening, tie one more time with a larger opening then arrange your tails how you like. Take some pics, check your hair in the tray because it is also a mirror I found out as I was taking my pics and do YOUR happy dance!!

Come in and have a visit, how do you take your coffee?


Always being renewed,

March 31, 2012

My version of the "spring" wreath

Guess what....it's not a wreath and it's not round. About the only thing that would qualify it as a wreath is it hangs from my front door and it has some flowers on it. I will post a tutorial on how this came together tomorrow. Enjoy tonight!

Wanna see?

A Silver Tray!!

You can even check yourself before you come into my house.


Sneaky peek

I wanted to create a romantic, woodland feel. Do those things even go together? Maybe if you love the Twilight series.


Originally had no bow on the bottom. 


Added another ribbon on the bottom to make it more secure

Is the bow better or the tether? I decided that the bow looked better

silk flowers from my wedding dress train (Those brown spots are not a mistake, these were made that way to make them look "old" and I guess rusty)


Welcome Home


Always being renewed,


Todays Creative Blog

As always, please visit my Link Party Page to see where I submit my projects. Please stop by these hard-working ladies and give them some love!


March 22, 2012

Upholsterying your walls

So you want to learn to upholster do ya'? This ain't not furniture upholstery tute. This is for you gals that love fabric so much you want to put it on your walls! I upholstered my entry way for a different reason. I had to! See why here, here, and here . I finally covered the staples so I thought I'd show you how easy it was. I did it without any help if that tells you anything. It might just tell you I am stubborn or crazy or both but after you see how easy it was, you will go for it too.

This is what I had to cover up....

Materials I used: (you will need to calculate your area to figure how much of each to purchase)
level and pencil
high loft batting
6x9 drop cloth  
staple gun 
staples spray adhesive
scissors
hot glue gun
gimp/trim or make your own like I did (in which case you also need a sewing machine)
wood trim for the top ( I used what was already there)
finishing nails
awl

How to:
1. Using the level, draw a line where you want the wood trim to end. You will upholster to just underneath that line


2. Spray your adhesive on the wall and apply your batting just underneath the pencil line. You do not have to go too crazy with the spray. Just enough to get the batting to stick. Cut off the excess batting from the bottom


I had to piece together some of the wall with the excess. I would have also used 2 layers of batting if I was doing this again.

3. Wash, dry, and iron your drop cloth. My 6x9 worked perfectly cut in half.


This is where the photography won't win any awards. I was doing this at night and there is no light in this little entryway so I was using the work spotlight.

4. Starting in the corner near the door frame, staple your finished edge to the wall and then go along the baseboard. Staple close the the edge of the cloth. You will be covered in the cloth and most likely bent over and stapling upside down. It worked that's all I know. Next staple the edge near the door frame. Staple about every 10 inches until  you are sure everything is lining up right. You will fill in when the cloth is tacked all the way to the wall. Now pull the cloth into your first corner and staple the corner tightly.


5. Now go along the next baseboard and then the other corner and the other side near the other wall.  Make sure you pull and staple tightly or you won't get a nice smooth look. Once  you have everything tacked in place smoothly, fill in your staples about every 2 inches. Again, make sure to staple close to the edge of the cloth.


It should look like this when you are done.

Staple the end and THEN cut the excess material off. Save it for later. I used mine to make my edging.

This is the other wall of the entry way.

6. I painted the trim that was already there in the same color as the rest of the wood trim. Then I nailed it in place using the pencil line as my guide. Countersink the nail heads using the awl and a hammer and then fill in with spackle. Touch up those spots with your paint.


Here it is all finished. It took about 1 hour to do the whole thing. The trim to cover took a might longer.

So here is your BOGTT ( Blog one get two tutes!) of the week:
How to make your own gimp/trim to cover those staples.

Material you'll need:
leftover drop cloth material
sewing machine
matching thread

How to:
1. Figure out how much trim you will need. I figured on about 13 yards but only needed 11. Gimp was gonna cost me $15 WITH the 40% discount so that motivated me to get sewin'!

2. Lay out the left over drop cloth or what ever fabric you want to use for trim. Contrasting fabric would also look great. It all depends on the look you are going after.

3. Mark off 1 inch increments equal to the number of yards you'll need. My fabric was over a yard long so I marked off 13. 


4. Now using your level again, mark the lines all the way down the fabric and then cut your strips.


5. Sew all of your strips together at the ends. Line up your fabric edge with the edge of your presser foot and sew, and sew and sew, and sew. You get the picture. Make sure you sew all of the ends together the same way or you will have your seam on the wrong side.


It should look like this.

6. Now fold your fabric like so. Like you fold a letter to go in an envelope. Your outer edges will meet in the middle and just slightly overlap. Sew the entire length of your trim like this. It only took about a half an hour to sew all 13 yards. 

Turn it over and it will look like this. Now you can hot glue it into place


How I turned the corners. I did not cut the piece, I folded it like a miter cut and glued in place.

You have officially upholstered your walls!! Nicely Done!

Cost of this project?
$10 drop cloth
$45 paint ($15 per quart and I used 3 quarts)
$8 batting
----------------------
$62!!!


Not bad for a transformation from this:


To This:

Awe-some!


Linking up with these blissfully beautiful bloggers: Feathered Nest Friday, The Shabby Nest,good one, ,,Photobucket
The DIY Show Off  shabby creek cottage  theartsygirlconnectionThe 36th AvenueRedoux Furniture Feature Fridays  {Primp} Photobucketfive days five ways | feature friday free for all


The Scott's Crib

LinkWithin

Related Posts Plugin for WordPress, Blogger...