
Okay so are you ready for the next flower in this little posy? Again, get ready for a super easy but beautiful flower made of drop cloth in under 10 minutes.


What you need:
Drop cloth scraps washed and dried and maybe dyed
Hot glue and glue gun
silver glitter glue

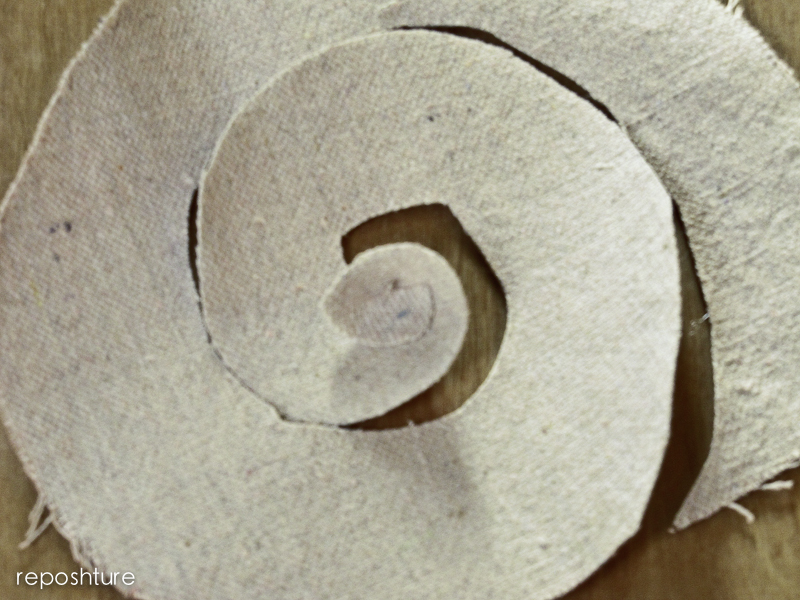
Start by cutting a circle about 6-7" in diameter. Then starting on the outside, cut a spiral into the middle. If you want greater uniformity, draw your spiral lines on the circle then cut. Or you can eyeball it like me and try and keep the spiral the same width all the way around.
Grab your hot glue gun and roll the middle into a cone about a half turn and glue in place.

Cut a piece of scrap drop cloth in a circle about 1.5" in diameter and put a dab of glue in the middle

Glue your spiral circle cone to the dot. Hold upright until dry. Now all you are going to do is ad some glue to the scrap circle and then keeping your spiral on its edge, glue the edge to the scrap. As with the fringe rolled rose, the tighter you roll it the smaller the rose and the looser, the bigger the rose. I kept my gluing medium tight so it made the rose about 2.5" wide.

When you get to the end, just hot glue the end in place well.

Here it is un-embellished. At this point you can leave it plain or dress it up with some silver glitter glue. I have tried crystal glitter glue and gold glue and I think the silver complements the grey and the pink the best. But these are your flowers so use what you want!

Here they are embellished. I just ran the tip of my glitter glue tube around the edges and put three dots in the middle.
Big glitter glue dot hint: To prevent your dots from being gloppy, release all the pressure on the tube before you lift it out of the glue dot. This way your glue dot does not become a glue string and drip over where you do not want it. It's a lot like an icing bag, if you have ever done that. If not then I've lost you obviously.

Here is a pretty close up

Check back in a few days and see how we make the two little flowers on the left. So is any body trying these? Please let me know and also let me know if you have ever done any other material flowers yourself. I'd love to know!
Always being renewed,

Please see the link party page to see where I link arms with those blissfully beautiful bloggers that host every week. So gracious they are along with these other sweet ladies!


I love these! I had no idea they were so simple to make. I definitely need to try one - I'll let you know how it goes. Thanks for sharing!
ReplyDeleteBeautiful! I did a tutorial on 3 fabric flowers I make quite often. Click here: http://makesupmylife.blogspot.com/2012/12/fabricflowertutorial.html
ReplyDeleteFabric flowers are my favorite! I make them all the time. I've made over 200 one time for a wedding--they all got made into bouquets for the bridesmaids. :)
Kim I just love these, and I think using the glitter pen is a fun tip!
ReplyDeleteThey are so cute and romantic! Would love to have one!
ReplyDelete