
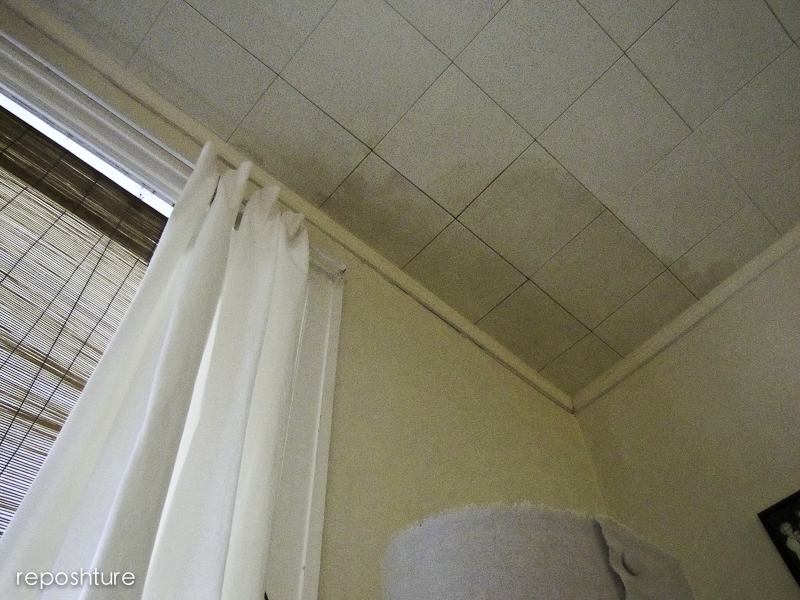
And maybe losing the ceiling tile helped a bit. So obviously I have been absent for a while due to the Living Room reno that we started two weeks ago. I cannot tell you how different it looks! If you really want to see what it looked like from the beginning, you can check out before and during by clicking on the link. Please go there so you can understand the entire saga.
Cliff notes?
Decided we could get new LR furniture after 13 years and wound up demoing the entire LR. It's like when you buy a pair of crazy cool shoes for just because you can get them for 80% off but then have to buy an entire outfit to make it work for full price. The actual cool part is this transformation only cost $360 (this does not include the cost of new furniture)!!!
There were some major problems with this room which we had to address with that $360:
1. Ceiling tile (have I said before that ceiling tile is for sissies? Go the distance and drywall for Pete's sake!)
2. This kinda goes along with the ceiling: no overhead lighting
3. Furniture placement is a pain in the butsky because of all of the wall interruptions. (I have tried 5 different furniture arrangements, none of which I have liked because I have two focal points in the room, a fireplace and the TV)
A few other cosmetic issues like the ugly ceiling fan and crappy hearth tile will be addressed later after I enjoy my new room dust free for a few days.
But here is an idea of the before and what we were dealing with:


Here is a little more of the process:

While my main man was out of town for three days my responsibility was to scrape walls and sand the ceiling in preparation for paint. Trust me when I say to cover the hair when you are sanding drywall
if you want any amount of moisture left in your hair.

Okay, who knew grey (gray? which is right?) was such a hard color to choose. Some were too blue, some to white, some to tan....... after about an hour of walking around the room and holding the swatches next to moldings from all four walls and windows......

Nimbus Cloud by Martha Stewart won out. It is a nice warm medium to light grey and it looks good in all lighting. I had Home Depot match it to their Behr paint and primer line because I like the coverage. The ceiling is painted in the same color but mixed at a 50% lighter shade. Once home and up on the ceiling, you couldn't even tell it was lighter! So I did my own little custom mix and added about a half a quart of white ceiling paint I had on hand and now love how it looks. Add the fact that I also no longer have to hear everyone say "So glad we painted the ceiling a 'different' color"......
We did have to seal the plaster walls with a special primer called "THE GRIPPER" because although I scraped and sanded and wiped down the plaster walls which had wallpaper glue on them, the paint guy said if any water got on the walls, it would activate any glue residue and bubble up the paint. Regular primer will not stop this from happening. Not having any of that after all the blood sweat and tears that went into these walls! I'll get to the tears part in a minute...
Verdict? This primer is amazing! First of all, the primer went on like a dream. So many times primer is difficult to apply because it is soaking into the new drywall quickly. Not the case with THE GRIPPER. Went on smoothly and easily. And it covered up the plaster stained walls in one coat. The paint as well went on so nicely that both the hubs and I were very impressed, which isn't easy to do since we have primed and painted a lot of walls in our day. The GRIPPER is a KEEPER.
I did say this was a saga didn't I? Can't have a saga without a few tears...
In the interest of not having to finish the corners where the walls and ceilings come together, we (meaning I) decided to add crown moulding thinking it would be an easy fix. We can dry wall with the best of them on flat surfaces but inside corners are a bear.

I am fairly sure when you cut crown that you are NOT supposed to have this many cuts when you only have 8 corners.
I had gone online to refresh my memory on how to cut crown and all said you need to lay your moulding upside down and backwards and hold it like it is going on the wall...... My mind might be a little upside down and backwards but are they serious with this nonsense! We would get one cut right and the next one would be wrong....so wrong...and the tears started at this point and maybe the stomping of feet in frustration, which is really a great role model for your kids to see when you are trying to teach them about staying calm during stressful situations....and this is a really long run-on sentence which is also a great model for your kids on how to write a proper compound sentence....
My sweetest hubs, tried to console me and say, "let's take a break and come back to this later because I have to leave for the Pitt basketball game" to which I replied in a loving tone "NOOOO, I am getting this right if it takes all night and you can help me if you want or not!!!!"
He wisely, silently, left the room.
Okay so if you get nothing else from this post that is probably my longest to date, print out this next picture and save it in a safe place!

I found this in the manual for our compound miter saw and OMGosh, it saved my sanity. And that of my son whom I now had to recruit to help me hang the crown because, well, I think you all know why.

Old homes have wonky walls and even wonkier corners so you will have some gaps like above but these will actually not be so noticeable once you caulk everything and touch up the paint.
Like the ceiling?
Paint your ceilings people! It is the fifth wall of your room and even if you just do a lighter shade based on the wall color, you will thank me later.
Another thing about painting your ceiling something other than white? If you have gone to all the stomping of feet to put up crown, then make it shine!!! Can you picture this ceiling in white? The crown would totally fade away and be barely noticeable.
It completes me, eh, the room.

Pot lights in.....

and on!

Hey my living room actually looks classy!
Lighting makes a world of difference in how a room looks. If you only have lamps as your light source, you will only have light from about 4 feet down! No matter how good your furniture or cool new art, or amazing architectural elements, no one will really appreciate it because they can't really see them....unless they are a flea....on the floor.....looking up.
I do want to give a HUGE shout-out to Liz from It's Great to Be Home blog. I came across her blog by accident and she tackles lots of design dilemmas. I took a chance and emailed her to ask for her advice about this funky room. She was really so kind and gave me many suggestions on furniture placement and furniture ideas for future purchases to make the room function. She also suggested that before placing the TV over the Fireplace, tape a piece of newspaper in place and try it out.
I'm glad we did. We taped a piece of paper over the fireplace and moved the sofa in front of the fireplace and sat for awhile. Neither one of us liked it. The room is just too short for this to work even if we put the TV on a tilt. We would have to have the sofa in the foyer for the viewing to be right and I really don't want to give up my mantel. And as my sweet man lovingly points out, I like to move things around to way too much for the TV to be in a fixed position. Add to the fact that we would be drilling into a double brick wall just about gives me an aneurysm thinking about it.
In the end, I stopped trying to make the TV and the Fireplace compete by having the TV on the opposite wall and I put it next to the Fireplace so both focal points are together.
I then removed the love seat and brought the club chair in from the foyer just to see if this would work better.
Okay, if you are still with me and I haven't totally put you to sleep with my ramblings, you can finally wake up because I am about to show you the final floor plan that took me 8 years to finally figure out! So please enjoy!


What do you think????? Before any of you comment on this, Yes, I do just have only the seat cushions covered in the slipcover because that is really the only part that needs to be hidden. And frankly, I will only have this sofa for another few weeks while I wait for a new sofa to arrive and I am desperately tired of straightening the sofa cover. Ok? Ok.
Recap:
Before After

Before After
So where did we spend the $360?
Dry wall: $60
Crown moulding: $100
Paint and Primer: $100
Pot Lights: $100
Home run messages for this whole post:
1.) Paint and lighting DO make a huge difference in a room so don't think you have to go all out to change up a room. Look at the problem areas and address those first.
2.) Change your furniture layout and continue to use what you have. Shop your house! I grabbed stuff from other rooms to add to the mantel and furniture from other rooms to make the room look better. I actually could live with this furniture longer because now I seem to like how everything came together much better.
We will be getting a new sofa and chair(s?), ceiling fan (I know but we gotta cuz' we don't got no AC! trust me it will look A-OK), probably a new TV stand on the cheap and an area rug. Stay tuned for re-vamps on the coffee table, curtains, and hearth.
So all this to say, I am not under any delusion that this a makeover worthy of Elle Decor magazine. Before, I thought everything was wrong with the room when really it was two major things: lighting/ceiling and furniture placement.
Once the problem areas got the fix, I am now able to focus on the positives of the room and it makes ME happy.
Which is a very good place to be.
Always being renewed,
Please see the link party page to see where I link arms with those blissfully beautiful bloggers that host every week. So gracious they are along with these other sweet ladies!


