May 29, 2012

Candaliere Tutorial

You are groovalicious!  I say that because you came back to visit again and I lurves me some visitors. I love sitting with you and sharing parts of our lives with each other.  So if you are here it means you want to make a candaliere!!


Okay then, let's not waste any more time and get started shall we? Here's a reminder picture of the Candaliere:


Here's the skinny on how a sidelight became a candle lit candaliere:

What you need:
-Any sort or wood shape, about 2 inches across: can be oval (like mine), round, square, rectangle you name, it it'll work. Mine was a piece of door sidelight molding found on the trash!

-party light candles, mine were in the little votive glass already. I used 24 for this.

-4 D-ring picture hangers

-GOOP adhesive

-ribbon of choice or heavy duty wire/chain (had already)

Total cost: $22.00

You can leave your wood piece its natural color or spray paint it like I did. I wanted it to look like metal since my porch bed is metal so I sprayed it with Rustoleum Oil-rubbed Bronze. If you paint it, make sure you do both top and bottom and all sides. Mine can be raised or lowered so I didn't want it to look incomplete if it sat at a  lower level. Also, the "molded" side faces the floor so that the candles sit on the flat side

Make sure the paint is completely dry before moving on to the next steps.

Attach the D-ring hangers  on the flat side of the molding on each end. Make sure you place them exactly the same distance from each end or it will be uneven, once hung. 


Lay out your candles to see how you want them spaced

Turn the candles over so their bottoms are facing up at the exact spot that you want them on the oval.
Apply a dab of GOOP to the bottom of the votive glass and on the wood exactly where the votive will sit.
Let cure for about two minutes then smush them together.

Let completely dry before hanging. 

Because it was a bit hot yesterday it took about 3 hours for the glue to dry. 
This will vary so plan to do other crafty projects while waiting!!!  
Or you can just cut your ribbon to your desired length, which takes all of about 3 minutes and then go write your own blog post!

I used about 4 feet of ribbon per D-ring. Thread the ribbon through the D-ring and tie in place. This will leave you two ends to tie onto whatever you are using to hang the candaliere. I have a wire cylinder I found last year at the Goodwill and a loooooong piece of spline that I have threaded through 2 eye hooks in the porch ceiling so I can raise and lower it to light the candles and blow those suckers out! I might have to invest in a candle snuffer or use Big Boy's young lungs to help a motha out.

Here's the tricky part. If you are using a pulley system like I am, then you need to lower the attachment point to where you want it to sit in relation to the candaliere, just like above.
Attach one ribbon and then attach the opposite ribbon, just like above. This will keep it balanced and even. Now tie the other two ribbons and make sure they are secure. Once I had the ribbons the exact height from the wire cylinder, I knotted them three times.

Now hang it or pull it as is the case here!


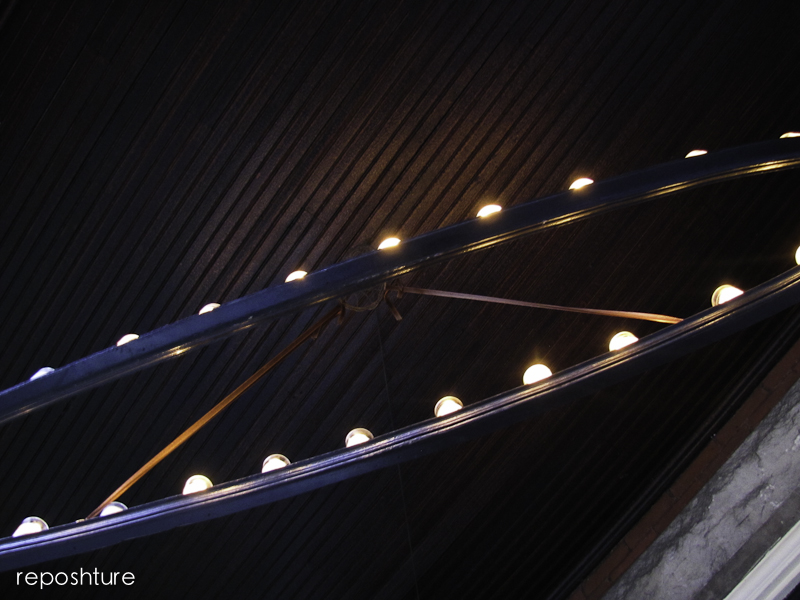
This shot gives you an idea of how the pulley system will work. I have the spline end anchored to the railing and when I need to light the candles, I can lower it and then raise it back up to where I want it to sit. I actually have it hung at a height that if I stand on the bed, I can light it and blow the candles out easily so I don't even need to lower it. But it will be handy when I need to replenish the candles or clean it.


I would change a few things if I did this again. If I find a set of metal attachments or something metal that would suffice, I will change the ribbon out. Just want something a little more secure. This isn't heavy at all but I have a growing boy who is apt to hit his head at some point and I don't want a flame to hit the ribbon and kerplunk, there goes the chandy! Yes, I do worry about his head as well, but as anyone who has a 13 year old boy will tell ya', it's a hard head!


It also spins a bit but what the heck, so do I so it fits right in!
We had a terrible thunder storm today and I was at Joann Fabrics during the whole thing.  All I could think of was I bet that candaliere is spinnin' like a top! But she survived with flying colors!

We all have a light inside us to be used for His glory and to spread His love and grace. Enjoy this song by Addison Road that highlights this truth with a very familiar childhood song.


I truly hope you will let “Let your light shine before men in such a way that they may see your good works, and glorify your Father who is in heaven." Matthew 5:16


Always being renewed,

Ironic Candaliere

Before I get to the awesomely easy lighting I just added to my front porch, .......

I have a quick announcement to make...NO, not that kind of announcement. Guess what? I know it isn't June 21st yet BUT......


It is officially Summer at our house 'cuz the Lem-o-nade stand was in full effect yesterday! 
How could you pass by these cuties? 

Okay, now the unofficial photo for marketing purposes. They only made $0.50 but they had fun and they are sooooo ready for Saturdays crowd. 

Now that you know that summer is here, let's move on to the font porch. I love my porch but the fabrics are a bit worn and I have been trying all manner of setups for providing soft lighting for our evening talks.


Here's a close up. Not terrible but if I took a really, really close-up, then you'd see how much work this needs. Very faded and blah.

  I am working on several projects for the porch to freshen it up on a budget so please stop back often to see them and to see the final "reveal". 

I have asked Ty Pennington stop by to let y'all know. He's checking his schedule...


My lighting issue got solved about two months ago on the way to dropping of Big Boy at the middle School. I found a door sidelight on the trash in all it's honey colored goodness. At the time I wasn't sure what I would use it for but when you see stuff like this, ya' gotta grab and go. Just like at thrift stores, you may not have an idea at the time but when you see something super cool, BUY IT!! It will come to you, I promise!

I spray painted it with Rustoleum Oil Rubbed Bronze, as usual. I think they should send me a free case  based on all the free press I give them about this product. It just rocks and looks amazing no matter what you put it on. So this got two coats, front and back.
Already looks better. Now how the heck did this become lighting you say?

Take a gander at it.....I call it the "Candaliere" 


Artsy shot

I love it!!! I was able to lay on the bed and read comfortably with my son while the hubster read his paper.     
He wanted to take a picture of me standing on the bed and blowing our the candles! There was no way I was doing that in one breath, while the candaliere spun at an alarming rate of speed. I may have passed out....at least I passed out on a comfy bed =0)

Come back tomorrow to set a spell with me on the porch and find out how I made lighting from a sidelight. Ironic.

Always being renewed,


Please see the link party page to see where I link arms with those blissfully beautiful bloggers that host every week. So gracious they are. Todays Creative Blog vif187 all crafts Homemade Projects ~ Add Yours! {5/1} Home Stories A2Z  
We Would Love For You To Join Us Each Wednesday...shabby creek cottage

May 25, 2012

Crib Trellis

I have struggled to find an economical way to stake my clematis plants. I have 4 in the backyard and they are not only big but bushy. I cut them to the ground every year and they grow back vigorously!  Last year I tried making a 3 pronged bamboo tee pee. It worked for about a week and then they toppled over. I think my choice of bamboo was a little thin. I should have bought thicker bamboo. Or I could could have purchased some for $12.00 each. But if I had done that then I would never have needed to fix the problem and I wouldn't have come up with this genius idea!

I collect crib sides. I have had one leaning in my garden for about a year. I also have the kids old crib that is no longer able to be given away due to safety reasons. I was a-bout to throw the old crib out when lightening struck.....
Trellis!!!

Now why I haven't used  the old one in the garden for this before now, I am not entirely sure. Sometimes it takes a long time for me to link a need with a solution. Must be the over 40 thing....or at least that's my story and I'm stickin' to it!


So here are my unfortunate clematis...

There are actually two here but the one behind this one is so totally flat on the ground you can't even make it out! 


Here's the skinny on how I turned  3 crib sides into 3 trellis'  in about 2 hours. It should have probably taken about an hour but I sorely miscalculated how hard it is to drive a stake into the ground....and now  my arms are sorely tired!

You will  need:

a crib side ( I have flair for the obvious don't I?)
2 wood stakes
4 wood screws, long enough to go through a stake and the crib side
rubber mallet, but keep a sledge hammer handy, that's all I'm sayin'


Get your supplies


This is where you miiiight need the sledge hammer.....Pound the stakes first!!!! 

Tired it the other way first, as in attach the stakes to said side and then pound. What an exercise in futility! 
Picture me hanging from the top rung, using my full body weight to try to get the darn thing to go into the ground. And no, no one was around to take a picture unfortunately. I know y'all would have appreciated it greatly! 


Screw the screws (that sounds so awk-ward, and what I might have mentioned a few times during this endeavor) about half way into the crib side. Then line it up next to the stake and screw them the rest of the way into the crib and stake. You will need to hold the stake tightly to the crib side as you are screwing or it will be wobbly.


Now isn't this better!!! 


This poor gal is a little worse for the wear but these clematis seem to come back no matter how hard I rough them up. 


I'm thinking of calling this one "The Beast"! Absolutely huge.

And here are all three of them together. The fourth one isn't really that bad so it can wait until I find another crib on the trash and then it will be rehabbed. I love that this cost me ab-so-lutely nothing! Well maybe my biceps paid the price.

I am off for a weekend with my older sister, Melissa, and her family. Should be all kinds of groovy fun swimming and hot tubing.  

I hope you all have a great memorial day weekend remembering our Vets and the amazing freedoms that we have because of them.


Always being renewed,

May 23, 2012

Guest Posting over at Live, Love, Green and a What will it be Wednesday/

Hey people! It's Two things Tuesday! Just kidding but I do have two things to share today.


First, I am not really here. I'll be talking to you today from Life, Love, Green! Amber is a green loving girl with a heart of gold. So make sure you visit her (and me, I miss you!) and find out what you could be doing to become more ecologically conscience, in a fun way.

Second it IS a "What Will it Be Wednesday?"
This is a trim piece from a sidelight door frame. Found it on the trash and of course did the grip it and rip it into the car in a downpour. So worth it. 
I am tweaking my front porch a bit and this is gonna be the perfect addition. Come back next Wednesday to see what it will be.......

Leave a comment to see who has the best guess. This isn't just for entertainment purposes, it is also to keep up the challenge of trying to look at things in a different light. 


Always being renewed,

May 21, 2012

Slipcover Alterations

I hate store bought slipcovers.

 but I hate this more...
oh yeah, already tried the turning over the cushion trick....

no dice.

So since these couches are still in very good structural condition (I often tell my husband that is why he should not trade me in for a younger model, I am still in very good structural condition, I just need a slipcover!), I couldn't justify new couches.

Now mind you custom slipcovers can run you about the cost of new couches as well and I could make myself custom covers but then I would need large amounts of uninterrupted time in which to accomplish that task and well, you know how that goes.  So I couldn't justify custom made slipcovers.


I bought the generic slipcovers and I loved them at first. But you just can't tuck all of that extra material and expect it to stay put! I have lasted a year before tackling this project. Really because I was secretly encouraging the children to jump on the couch. Yeah go ahead and jump, jump, jump! Hoping they might break the arm off or something equally devastating and we would have to buy some new furniture. Be it known, these couches are 13 years old and I am due!! 

But patience Kimmy-san, patience

They looked so new and fresh and then the kids sat on one of them......and they instantly lost the new blush of slipcover beauty.
Rumpled......and this is a good day! Somehow most of the members of my family don't just sit on the cushion. They would rather sliiide into position via the armrest which means that most of the time the slipcover is up and over the armrest exposing its foundational garments that it was originally clad in. Embarrassing for all parties.

How can you remedy this sad situation?

Customize the store bought slipcover. 
 This is not for the faint of heart or the inexperienced sewer ( that would read sew-er, not sue-er. That would be gross and we don't do gross on this here blog). So if you feel rather comfortable around a sewing machine then you can do this.

Okay- here's the skinny:
Place your slipcover on your couch, WRONG side out. I started by pinning the center of the slipcover. By that I mean I placed the side seams where they should line up with the side seams of the couch and then pinned the excess in the middle. Draw a line using a highlighter about 1" from the pins. 


Take off the slipcover and sew on that line. I cut off all of the excess before I sewed it as it really got in the way when trying to fit it to the couch. But I am rather fearless like that and figure what's the worst that can happen.... I'll have to get a new couch. (if you think you are hearing evil maniacal laugh right about....now..... YOU ARE!! Ahhhahaha)

I put the slipcover back on wrong side out and then pinned the arms and side seams. I really did need to cut away a lot of the material because they add so much here in order for it to fit the majority if couches. then I just pinned again and drew my line and then sewed those two seams.


I added a few pleats to take up the excess of the upper arm area and make it fit better. Here it is violating all slipcover laws....

This is it from the right side of the law

This is the inside arm area. I did pin each seam and then sew it before pinning the next section. You can pin all of the seams and then sew all of the seams.  I felt like I would fit it better if I could take out the excess bit by bit and then I had a better end product.  Be crazy and do what cha like!

I did the deck last. That is what the white part is called. I pinned the sides and corners and then did the back. When doing this make sure that you first place the skirt at the height that you want and then pin it in place so it doesn't move while you manipulate the deck area to fit it. This last part will take patience as the corners were wily. They have 4 different seams coming into them and I had to continually check the center to make sure I wasn't pulling it off center in the back but I think it was worth it.
I still need to tuck occasionally but it is tons better.

This took me about 2 hours over all, I had a few interruptions so i am guesstimating a bit. I try to give a time table for all of my projects so y'all can plan accordingly if you want to give said projects a whirl and I hope that you do. It will save you a ton of money and I am all about saving  the mooh-la.


What do you think? 
If you like it does that mean I have to keep the couch?

Yes because I need to be content with what I have currently. Often times we want and we want and we want and we don't realize what we already have. I have a structurally sound couch so I don't need another one. A messy slipcover means my kids are at home and have fun in our house. In a few years my kids will be grown and I'll wish to see the slipcover askew. I also know that eventually, we will be able to do the LR and I can get some new couches then but in the meantime, the Lord is teaching me to rest in Him. He is faithful to either help me to see ways that I can be content or how I can make something less annoying and more workable for us. And guess what?

I am OK with that


Always being renewed,


Please see the link party page to see where I link arms with those blissfully beautiful bloggers that host every week. So gracious they are. Todays Creative Blog vif187 all crafts Homemade Projects ~ Add Yours! {5/1} Home Stories A2Z 

May 20, 2012

Easy Peezy iPod cake

I feel like I have not seen you guys in for-eva! Sorry I have been absent for a few days. My son turned 13 today, and I had mucho preparation-o to do for the BIG sleepover par-tay on Friday night and I am still recovering from said Par-tay where we had 10 13 year old boys "sleeping" in a 12x15 space.  They truly do not have any idea about how large they have become or about personal space. OR about how too much methane gas ( you know what I'm talkin' about here) will require a call to the fire company to check if safe oxygen levels are present in your home.......

Jake couldn't decide what kind of cake he wanted. We had to strike the right cord for the cake, it couldn't be cheesy or babyish. It had to be "cool". He loves music so the idea he finally decided on 2 days before his party.......

iPod.

I googled iPod cakes and realized fondant at this point is out of my league and not an option. I am pretty good with an icing bag but those icons gave me the willies. Too much detail.

I am going to share a life saver and super cool way to personalize a cake for your kids.

Wafer paper and edible ink!

I printed out a screen shot of the icons from an iPod touch and layed the wafer paper over the printout and traced and colored the icons I wanted with edible ink markers. Now those were not so cheap but I will use them over and over again so I think it was worth the expense. The wafer paper only cost $0.25 a piece!

Here it is! What do you think?

Here's another cake tip for you. Super smooth icing can be had for the price of a roll of Viva paper towels! Butter cream icing gets a crust on it once it has air dried a bit. Wait until this has happened and then take one section of the Viva towels and lay it on top. Gently and lightly rub your open palm over the surface and you will have a surface that is smooth as a baby's boo-tay.

If you notice, there is also a pattern on the edges. Use a paper towel that has a pattern and lay it where you want the pattern to be and run your palm over it the same way! Badda-Bing! Pattern in your icing without having to take the Wilton cake decorating course! You could do the pattern over an entire cake and it would look amazing. Go for it!!!

I did learn that after you color with the markers I probably should have laid a book over top of it so the edges didn't curl but now YOU know and you will not make that mistake! You attach the wafer paper with either Crisco or piping gel. Just paint it on the back gently and place it where you want it.  
You could use this wafer paper technique on cookies or on cupcakes. 

The beauty of this technique as well, you can so easily personalize it for your kids (or whomever).
If you can trace and color in the lines.....
Your golden!

Here is a close up of the pattern, and the rice paper curling and the "camera"
Say Cheese!


Always being renewed,


Please see the link party page to see where I link arms with those blissfully beautiful bloggers that host every week. So gracious they are. Todays Creative Blog vif187 all crafts Homemade Projects ~ Add Yours! {5/1} Home Stories A2Z  
shabby creek cottage

LinkWithin

Related Posts Plugin for WordPress, Blogger...