
If you followed my post on the old coat rack I found in the trash......and if you guessed lighting from an old coat rack....
Then you might be a redneck!
or just plain smarter than a fifth grader!
Or just plain smart cuz you thunk outside the coat rack.
Or you are becoming more like me everyday and you should be afraid, verrrry afraid.

So how did this...

get to this?

Actually it is pretty easy! If you can read then you can wire anything into a lamp. Because the directions are on the back of the wiring kit and they are really easy to follow.
You just need to think about how you want the wire to sit on your coat rack. Since I uh, do NOT have a 5 foot long drill bit, I knew I would need to add two holes. One to the top and about 1 inch down from the top that would intersect the center drill hole. I cut the top 6 inches off of the top of the coat rack because I didn't think it would sell if you needed a step ladder to reach the switch.
Super Important!
Use a drill bit slightly smaller in diameter than the nipple you are using. Or you will not, I repeat, you will NOT have a lamp at all. You will have a lampshade and light socket that is dangling in the wind. And it WILL look like an amateur did it. So make the hole smaller, you can always use a little bit bigger of a drill bit if it is too tight.
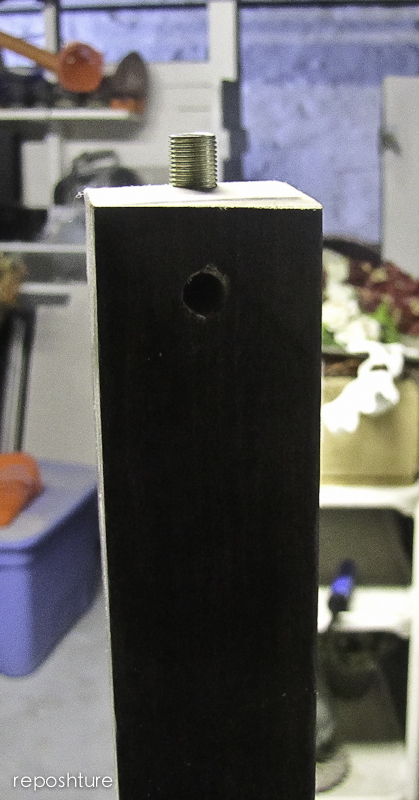
Here is the up close of the two holes drilled. I added the nipple and then realized I might have trouble grabbing the wiring as I threaded it from the side. So I removed it and then threaded the wire.

Thread the wire through the side hole and up through the top

Like so

Add your nipple and nut to tighten in place

Add the harp (big metal thing) and then the socket over the wire. Screw in place

Connect your wires ( which I am going to tell you to read on the back of your packaging because they do a much better job at that than I will) and then add the socket cover.
If you are changing something into something else, like this project, you will need to think of scale. As I said before, I cut off 6 inches to make it the typical height of other floor lamps. I also had to change out the original lampshade that I had set aside for it because it was way to small once I added it. Luckily I had a $0.95 gigantic lampshade hanging out in the hoard ready to do its duty.
Remember, in order to see things not as they are but what they will be, you need to visualize.
I almost always see the form first then function but I am naturally wired that way. Hah, pun intended!
What if you have no idea what to do with a piece that you have curb surfed? You just knew it was worth saving but now are stumped?
Why not think of things you might need in your house and see if you can make it work as a solution?
As someone else to take a look at it and see what they think.
But don't give up. Sometimes you just need to take small steps and try to look at one thing differently a day. Pretty soon, you will have re-trained your brain and you've unlocked the creativity that was just waiting to be electrified.
(I could not help myself, I am truly sorry for that bad humor. It is 9:45 p.m. That is my only excuse.)
Love you madly!
Always being renewed,

Please see the link party page to see where I link arms with those blissfully beautiful bloggers that host every week. So gracious they are along with these other sweet ladies!
 Read more at http://diyshowoff.com/2013/04/01/that-diy-party-10/#xgMAcRCgRocl5vmh.99


No comments:
Post a Comment
Lay it on me! i love to hear from you!