I wanted to be able to change up the look of the lamps so I decided to make a shade slipcover.
You will love how easy this is and how you can whip it on and off in mere seconds. You will feel like a decorating superhero but without the the phone booth or the annoying tights!
I love the modern look of the dry erase poster board but what do you think of the drop cloth slipcovers?
This is something that you could make for each holiday, season or week...depending on how ADD you are.
I used left over drop cloth, hooks and eyes, and some covered buttons to make my slipcover.
My shades are 11 inches wide so I cut my drop cloth 12 inches wide and then washed it so it would fray. If you do not want frayed ends, still cut it 1" wider but hem it. I would use iron on Stitch Witchery so that it lays flatter than sewing it in place. Iron it and then wrap it around your shade.
Clip it in place and mark where you want the overlap to be on the top and the bottom.
Since drop cloth can be used on either side it will not matter which side you mark. If you use regular fabric mark it on the wrong side so it doesn't show on the finished product.
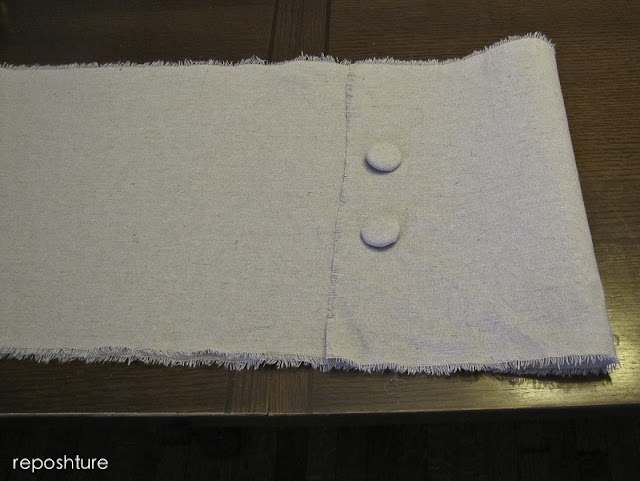
Lay it out like so on a flat surface
Fold over the the other end to just cover the opposite end
Now I made my covered buttons, see here for a full tutorial. You might like two buttons per shade....
I thought three looked tidier
I used an adjustable hook and eye for the top and a regular one for the bottom. You can add one in the middle if you like. I sewed the eyes in place because they would be underneath the overage. I hot glued the hooks in place after I repinned to make sure of exact placement. It is pretty hard to stitch and not have the stitches show.
Place on your shade and turn it on.....
Remember you can see everything once the light is on? Take off the slipcover and trim back the bottom portion. You can also fray the end that has the buttons on it if you like. I liked so I frayed.
Whip it back onto your shade. Personally, I love the frayed edges and the buttons.
Now give your tights a snap or someone close to you who won't mind.....
Always being renewed,


They look great! I have been trying to decided for a while now what to do with a lamp in my living room. You have inspired me.
ReplyDeleteThe lamp shades are fabulous. This is such an awesome post. I would love it if you would share this post at our WIW linky party. Hope you can join us. :-)
ReplyDeletePaula
ivyandelephants.blogspot.com
Great idea! Thanks for sharing!
ReplyDeleteAbsolutely loving the shades. love the addition of the buttons really a great finishing touch. I sure likey! Thanks for sharing your inspiration with Sunday’s Best – you helped make the party a success!
ReplyDeleteThis is so cute! I am looking around at every lampshade in my house now, and the ones bound for Paris Flea Market! I have tons of leftover drop cloth and burlap. Better get started!
ReplyDeleteLuv this idea...thanks for sharing it at my party this week.
ReplyDeleteBlessings,
linda
OMG that is very clever. I'm always changing my curtains and my pillows now I can add slipcovers for my lampshades to the mix. I'm your newest follower. Come check out my blog when you have a minute at http://sister-number-5.blogspot.com
ReplyDeleteRemarkable idea! You're so creative and I love the frayed edges too. Thanks for sharing!
ReplyDeleteThanks Casandra! I think the "frayed" accurately reflects my personality!
DeleteXO
Such a fabulous idea Kim!!! It looks sooo pretty!
ReplyDeleteThanks so much for sharing this at The DIY Dreamer.. From Dream To Reality!
I am writing up my features post and you are on it. I just did last weeks and featured your tutorial as well.
ReplyDeleteCheri
Love the frayed edges and the buttons! Nicely done!
ReplyDeleteI love this shade cover. So clever! Thanks for sharing on Tout It Tuesday! Hope to see you tomorrow.
ReplyDeleteThis comment has been removed by a blog administrator.
ReplyDelete